Copyright © 2011-2026, Paul Scrivens-Smith

Copyright © 2011-2026, Paul Scrivens-Smith

All rights reserved. This work may not be reproduced, in whole or in part, without the prior written permission of the creator.

Showing posts with label WWII Naval. Show all posts

Monday, 7 July 2014

Naval Thunder - 2nd Battle of Guadalcanal

Washington
On Tuesday evening Mog and I played our first game of Naval Thunder for a very long time.

I prepared the ship charts from the scenario at the back of the book,
The US forces were Task Force 64:

US Destroyers
  • BB Washington (Flagship) 
  • BB South Dakota 
  • DD Walke 
  • DD Benham 
  • DD Preston
  • DD Gwin 

The Japanese force was made up of the following elements
Bombardment Element
  • BC Kirishima 
  • CA Atago (FF) 
  • CA Takao

Sweeping Element
  • CL Sendai
  • DD Uranami
  • DD Shikinami

Detached Scouting Element
  • DD Ayanami

Screening Element
  • CL Nagara 
  • DD Samidare
  • DD Teruzuki
  • DD Inazuma 
  • DD Asagumo 
  • DD Shirayuki
  • DD Hatsuyuki
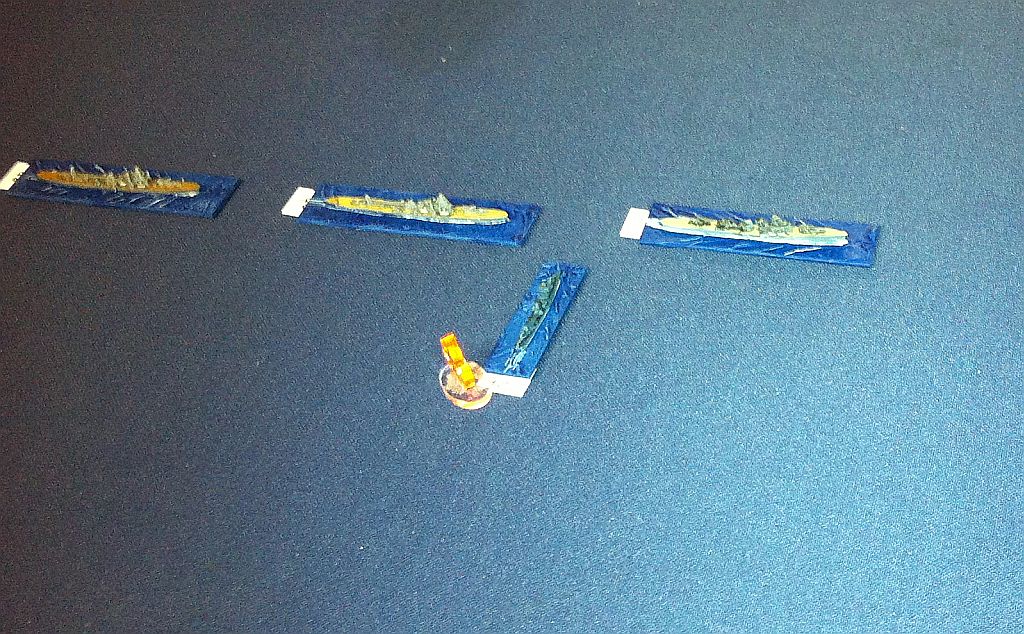
Sendai
Setting up the mission we then randomised who got the forces, Martin was the US Navy and I was the Imperial Japanese Navy. The two forces edged closer and the Ayanami was soon exchanging shots with the US destroyers. The action started in earnest on the fourth turn, engaging a radar target a Salvo of 16" shells crashed into Sendai sinking her immediately, Benham finished off the badly outnumbered and out-gunned Ayanami who in her death throes set Benham on fire which was also abandoned sinking.

Things continued well for the US Navy, next turn a salvo from Washington sank Shikinami, while a salvo from South Dakota sank Uranami whose torpedoes had missed the battleship. Walke torpedoed and sank the light cruiser Nagara, thinks were looking bad for the Japanese Navy.

However, the US destroyers were now badly outnumbered themselves, Walke, Preston and Gwin were soon despatched to the bottom. 

Another fantastic radar controlled shot from Washington knocked out B turret on Kirishima. 

Nagara about to meet a sticky end
The Japanese destroyers now closed on the US battleships who had lost their screening destroyers and soon  24" Long Lance torpedoes were cutting through the water towards their targets. Cry foul, out of all the torpedoes launched only a single one struck Washington and exploded with little effect against the torpedo bulges. For their troubles Teruzuki was sunk by the 5" secondaries of Washington and Shirayuki by the 5" guns of South Dakota. Kirishima too another four 16" shells from Washington.

It was time to call a close, the Japanese had taken a pounding, loosed all their torpedoes to ill effect and the remaining ships were in grave danger from the 16" guns of the two US battleships.

I don't think I would play it any more different the next time, just hope for better effect from the Long Lance torpedoes and not quite so many long range 16" gun hits from the US Battleships.


Monday, 26 August 2013

Another half-box of Desert Rats

This weekend I did the highlights and bases on another 20 Perry Miniatures Desert Rats for my continued 5th Indian Division in East Africa project.

This time I made a few up carrying picks and shovels, the intention being to eventually have a section or two of Bombay Sappers, not to be confused with Bombay Sapphire which is also very nice.


Not a Bombay Saaphire. Confusing isn't it
Not a Bombay Sapper

Shows the way

BREN team

Grenade! with a suave scarf

BREN team at rest

Tuesday, 12 March 2013

IJN & USN Reinforcements

I've been a bit slow on the painting front over the past few weeks, what with the WAB GT and all that. However I have managed to polish off a bunch of Navwar 1/3000th ships that have been lying around.

Amongst this lot I painted I now have all the ships that I need in order to do a re-fight of the Battle of the Coral Sea. Whether we actually get around to doing that is another thing, but at least the option is on the table.
The list of ship painted this session included:
  • USN Carriers: Lexington and Enterprise
  • USN Cruisers: Minneapolis, New Orleans, Salt Lake City & Pensacola
  • USN Destroyers: 20 various destroyers
  • USN Sea-plane Tender: Langley
  • USN Oilers: Neosho and Tippecanoe
  • IJN Carriers: Shokaku, Zuikaku and Shoho
  • IJN Destroyers: 14 various destroyers
  • IJN Mine-layers: Okinoshima and Tsugaru
  • Cruise Ship: Orcades
Sad lad that I am, I now have 239 ships painted for the Imperial Japanese Navy, Koninklijke Marine (Dutch Navy), Kreigsmarine, Royal Australian Navy, Royal Navy, Royal New Zealand Navy and US Navy and can fight all of these actions with the stuff I have painted:
  • Battle of the River Plate
  • Battle of the Java Sea
  • Battle of Sunda Strait
  • Battle of the Coral Sea
  • First Battle of Savo Island
  • Battle of the Eastern Solomons
  • Third Battle of Savo Island
  • Fourth Battle of Savo Island
  • Battle of Empress Augusta Bay
As I said, sad sad lad....

I took a lot of pictures but most of them came out pretty shoddy, here is the best of the bunch...


Shoho, Shokaku & Zuikaku

Neosho, Tippecanoe & Orcades

14 Japanese Destroyers


Saturday, 15 September 2012

Savo Island refight with Naval Thunder

A few weeks ago Greg, Ben and myself refought the Battle of Savo Island using General Quarters III, thsi was a resounding victory to the Allied forces.

Having had a couple of games of Naval Thunder last week with Quinton we decided to give the battle another go with these rules.

We used the "Battle of Savo Island" scenario from Bitter Rivals Quinton would use the Japanese while Greg and Ben would take on the Allies. I would generally facilitate and get in the way.

Things started well for the Japanese, they sneaked undetected to within close range of the southern group and let leash. Chicago, Canberra and Patterson were all badly damaged by gunfire with only minor damage  to the Japanese. However subsequently all the ships in the Southern Group turned their guns on Aoba which was raked by effective fire and sunk, but not without the loss of both Chicago and Patterson. Long Lance torpedoes thudded into Canberra and she was also stricken but did cause severe damage to Kinugasa in return.

By now the southern group was reduced to Bagley who was putting up a doomed but game fight. Only a single American torpedo found its mark and that proved to be a dud - damn those magnetic detonators!

The Northern Group was now into the melee, Vincennes took heavy damage in the initial salvo from the Japanese 8" guns, but Kinugasa was delivered the Coupe De Grace. As the engagement drew to a close Vincennes was accounted for and Quincey badly damaged but Kako was also severely damaged in return.

As is likely to be expected one American destroyer - Helm - was sunk by friendly fire in the confusion.

The final state was:

  • Chokai - Moderate damage
  • Aoba - Sunk
  • Kinugasa - Sunk
  • Furutaka - Undamaged
  • Kako - Heavy damage
  • Tenryu - Undamaged
  • Yubari - Undamaged


  • Chicago - Sunk
  • Canberra - Sunk
  • Patterson - Sunk
  • Bagley - Sunk


  • Astoria - Light damage
  • Vincennes - Sunk
  • Quincey - Heavy damage
  • Helm - Sunk
  • Wilson - Undamaged


  • Blue - Moderate damage
  • Ralph Talbot - Moderate damage


All in all a great game that ended in a draw, a lot better result than the last time when the Americans did far too well.

Sorry for the quality of the photographs, Victoria was using the 'main' camera so I made do with the rubbish iPhone one.

Allied Northern Group

The Japanese cruisers

On fire and badly damaged Bagley goes in with the torpedoes


Monday, 10 September 2012

Japanese Air Armada

On Tuesday we are planning a game of Bag the Hun at Maelstrom Games using Japanese and Americans. John has already painted up all the Japanese we will ever need, but I have had a bag of Tumbling Dice Japanese aircraft in the lead mountain for a long time, so I took the opportunity to get these painted up.

The aircraft were painted using Vallejo Acrylics and Doms Decals transfers were used.

As well as playing Bag the Hun with them, I'll also be using them for air attacks in our 1/3000 WWII naval games using General Quarters or Naval Thunder.

Here are all 33 aircraft painted up this weekend.

12 Mitsubishi A6M3 Zero fighters

3 Mitsubishi G3M Nell bombers

4 Mitsubishi A5M Claude fighters

4 Aichi D3A Val dive bombers

6 Nakajima B5N Kate torpedo bombers

Mitsubishi F1M Pete float planes

All 33 aircraft


Thursday, 6 September 2012

Naval Thunder - Double Header

On Tuesday evening at Maelstrom Games Quinton and I tried out our first game of Naval Thunder.

As well as Battleship Row, I had also purchased the Bitter Rivals supplement so we played the Battle of the River Plate scenario. We had not played before, but the rules seemed straight forwards enough. I would play the Royal Navy and Quint would be the Kreigsmarine.

Things started badly for the Royal Navy some excellent shooting from the Graf Spee coupled with some terrible shooting from the Exeter and the first Royal Navy vessel was heading to the bottom. Achillies and Ajax had closed the distance and were soon engaging the Graf Spee.

The 6" guns on the two light cruisers were more effective than the 8 guns of Exeter and the Graf Spee was soon down to a single 11" turret and was slowed down, but Achillies was also dispatched.

In a final dance of death Ajax and Graf Spee had a round of shooting that was reminiscent of the HMAS Sydney / Kormoran engagement both were heading to the bottom.

Crikey, it was only half past eight, time for another game. Fortunately, I had also printed out the rosters for the Battle of the Denmark Strait. This time I would play the Kreigsmarine and Quinton would take the role of the Royal Navy.

Playing to history, my first salvoes from the Bismark were soon straddling the Hood, although no momentous explosions were noted, but the Fire Director was knocked out on the Hood. True to form, the Prince of Wales was firing badly but did hit the Prinz Eugen with a single 14" shell. Deciding that her 8" guns were adding nothing to this engagement I broke off with the heavy cruiser.

The Hood turned to engage the Bismark with broadsides while the Prince of Wales continued on an interception course. However, the Hood was soon listing badly and slowed to just a few knots, with all this damage and without a Fire Direction center the Hood was out of the engagement. The Bismark now engaged the Prince of Wales in a close range fire-fight. Although badly damaged with one 15" turret out and a lot of structural damage one 15" salvo crashed into the Prince of Wales which suffered a magazine explosion and sank without a trace.

The Bismark was soon steaming into open seas, the adventure would continue.

This was our first couple of games of Naval Thunder and they do give a fast and fun game and we have already arranged another game for a couple of weeks time.

I did not take any pictures during the game.


Sunday, 26 August 2012

Pacific War Reinforcements

Back in my teens I used to own a massive collection of WWII ships and would play many a game of General Quarters with my mates. I let these ships go the way of eBay many years ago, and if I'm honest they looked like they were painted thirty years ago and were not getting any usage.

A couple of years ago we re-discovered General Quarters and I started building up a new collection of 1/3000 WWII naval ships again. Although this time I would find an historical battle and then purchase all the ships needed to play it rather than buying massive, disparate fleets on a whim. I've mainly concentrated on cruiser size battles and below as you can have a really good game on an 8ft square playing area.

A few days ago, I placed a small order on Navwar and with typical Navwar efficiency they were with me in just a few days. It was just a matter then of painting them. This is the method I use:

  1. Clean up the ships
  2. Stick to plywood bases, typically 75mm x 25mm for cruisers and 50mm x 20mm for destroyers
  3. Create a 'sea' effect with Vallejo Gel Denso
  4. Spray with Halfords grey primer
  5. Paint the ships with Vallejo paints, I find this guide really useful for painting the USN vessels. This is also a really good comparison chart for the Vallejo colours.
  6. Paint the bases with Vallejo Prussian Blue
  7. Drybrush the entire ship and base with Vallejo Pale Grey
  8. Wash the decks and super-structure with a glaze of Vallejo Black
  9. Wash the 'sea' with a glaze of Vallejo Dark Prussian Blue
  10. Hilight the sea, wake, etc. with Vallejo White
  11. Varnish with matt varnish

In just a few hours this weekend I have painted 5 IJN cruisers, 18 IJN destroyers, 2 USN cruisers, 18 USN destroyers, 2 Royal Netherlands Navy destroyers.

Here are some shots of the ships painted over the weekend:

Having painted these last few ships, I now have every ship in my collection to do the following historical engagements:


  • Battle of the River Plate
  • Battle of the Java Sea
  • Battle of Sunda Strait
  • First Battle of Savo Island
  • Third Battle of Savo Island
  • Fourth Battle of Savo Island
  • Battle of Empress Augusta Bay

Plus I have a few extra ships so that I can do many 'what-if' engagements too. It's become rather an obsession and I now have the following painted ships in my collection:

  • Imperial Japanese Navy : 2 battle-cruisers, 16 heavy cruisers, 10 light cruisers, 1 aircraft carrier, 44 destroyers, 1 sea plan tender & 3 submarines.
  • Kreigsmarine: 1 battle-cruiser.
  • Royal Netherlands Navy: 4 light cruisers & 6 destroyers.
  • Royal Australian Navy: 2 heavy cruisers, 3 light cruisers & 3 destroyers.
  • Royal Navy: 4 heavy cruisers, 1 light cruiser & 8 destroyers
  • Royal New Zealand Navy: 1 light cruiser
  • United States Navy: 2 battleships, 9 heavy cruisers, 13 light cruisers, 38 destroyers & 4 submarines.
  • Merchants: 12 various ships

Here are some images of the ships painted this weekend:


IJN heavy cruisers: Takao, Atago, Maya, Aoba & Kinugasa

18 IJN destroyers of various classes


Koninklijke Marine destroyers Van Nes and Van Ghent
USN light cruisers Atlanta & San Diego

18 USN destroyers of various class

IJN heavy cruiser Aoba

IJN heavy cruiser Takao

USS San Diego


IJN destroyer Ayanami

IJN destroyer Harusame


RNN destroyer Van Ghent


USN destroyer Parrott


Sunday, 5 August 2012

Battle of Sav 'Oh No' Island

At Mansfield Wargames Club back in 2009 we started running a series of WWII+70 games where we would pick an action that happened about 70 years ago and re-fight it at the club. What with other commitments and projects it petered out a bit. However, at the recent AGM we decided that we would give it another go and I would set up a game.

We would be playing on the 2nd August, so looking on Wikipedia for a week either side of 2nd August 1942 I came up with the following possibilities:


27th July 1942: The First Battle of El Alemain
I have some 6mm troops for this, but they are a bit early. If Greg could bring his 15mm stuff I could add it to mine and do it. The rules options were BlitzKreig Commander, I Ain't Been Shot Mum or Flames of War.

28th July 1942: Order No.227 
I've got loads of 15mm Eastern Front, again the rules options were BlitzKreig Commander, I Ain't Been Shot Mum or Flames of War.

7th August 1942: Battle of Guadalcanal
I have some 1/600 Japanese and US planes so could do a Bag the Hun.

9th August 1942: Battle of Savo Island
This is probably favourite as I already have all the ships for it and could use either General Quarters or Naval Thunder.

In the end I decided to do the Battle of Savo Island using General Quarters.

I had created a set of rosters for both fleets and a set of scenario rules that would give the Japanese all the advantages with the Allied forces having a good chance of:

  • Firing both guns and torpedoes at illuminated friendly ships.
  • Ordering their own ships to cease fire as they may be engaging friendly ships.
  • Failing to illuminate Japanese ships with star-shells as they had a high failure rate.
  • Failing to pass on, or acknowledge the position of enemy ships.

Two 8ft x 4ft tables were set up alongside each other. On one table was half of Savo Island and the North Patrol Force (Vincennes, Astoria, Quincy, Helm Wilson) along with the destroyer picket Ralph Talbot. On the other table was the South Patrol Force (HMAS Canberra, Chicago, Patterson and Bagley) along with the destroyer picket Blue. It was assumed that the northern edge of the north table represented Florida Island and the southern edge of the south table represented Guadalcanal.
Northern Patrol Force

Southern Patrol Force
Mikawa's force consisted of Cruiser Division 6 (Chokai, Aoba, Kinugasa, Kako and Furutaka) and Cruiser Division 10 (Tenryu, Yubari and the destroyer Yunagi).

The Allied ships were issued a standard patrol plot at 10knots and could not deviate from that plot until they confirmed that they were under attack. Mikawa's force entered the southern table at 22knots.

I would play the Japanese, Greg and Ben the Allies.
Mikawa's cruisers enter the fray
The Japanese started well, they were picked up by the destroyer Blue who attempted to pass the news of the raid on but was ignored. Realising that they had been spotted Cruiser Division 10 were dispatched to deal with Blue.

Blue launched a spread of torpedoes at the cruisers but achieved only a single hit that proved to be a dud. Tenryu then engaged Blue in a gunfire duel, but was herself set on fire but Blue also suffered a damaged rudder.
Tenryu set on fire by Blue (in the background)

The rest of Mikawa's cruisers continued unmolested and undetected until they were within 1500 yards of the Southern Patrol force at which point they opened up with a tirade of gun fire and torpedoes. What a shambles! The gunfire either missed or was ineffective. Out of all the spreads of torpedoes launched, with a very high hit probability only a single torpedo hit Canberra and that only did very minor damage.

Cruiser Division 6 engage Southern Patrol Force
The Allied did not have it all their own way though, the Southern Patrol Force were in confusion and despite opening fire with the Cruisers the order was immediately countermanded after only a handful of shots. Patterson and Bagley did fare better and seriously damaged Aoba with gunfire and torpedoes.

The two cruiser forces continued to engage, but even with the confusion in the Allied ranks the Japanese could not get the upper hand. Chicago was eventually sunk, but so was Aoba. The fires continued to rage aboard Tenryu and she was eventually abandoned but not before finishing off Blue.

Mikawa decided to break off the attack and head back to Rabaul, but it was not over yet, with only two functioning turrets, Canberra caused a hit on Furutaka that penetrated the magazine and the ship exploded.

At the end of the game the allies had lost Chicago and Blue, Canberra, Paterson and Bagley were all badly damaged. The Japanese had lost Aoba, Furutaka and Tenryu and Chokai was slightly damaged. The Northern Patrol Force had remained oblivious to the whole event.

A terrible day for the Imperial Japanese Navy

Vincennes and Astoria

Chicago and Canberra