Copyright © 2011-2026, Paul Scrivens-Smith

Copyright © 2011-2026, Paul Scrivens-Smith

All rights reserved. This work may not be reproduced, in whole or in part, without the prior written permission of the creator.

Showing posts with label 1st Corps. Show all posts

Monday, 19 January 2026

Barons' War Additions (2)


More Barons' War goodies. All but one from the Wargames Atlantic range.

Pair of mounted Knights

A knight and his associated bannerman. All the livery, shields and standards are painted in plausible but not specific heraldry. Both of these wear plain surcoats without livery.

Pair of mounted Knights

Five foot Knights

Five foot Knights, the heraldic animals are VVV decals that are added as part of the base-coat and then highlighted with the other colours.

Five foot Knights

Squires and Serjeants

The two foot Serjeants are from Wargames Atlantic, burdened squire is from 1st Corps, the shield was done in the colours of Guillaume II des Barres.


Squires and Serjeants


Saturday, 26 June 2021

Let's get the band back together - Warring States Chinese


Next weekend I've signed up to play in a Warhammer Ancient Battles event over at Mansfield Wargames Club. Nearly all of my figures are in a container somewhere in transit, but, I did have my venerable Chinese in storage here in the UK. 

I had attempted, unsuccessfully, to sell the lot before I moved, but ended up only selling a few bits and bobs so would need a replenishment draft. Consequently, I made a swift order to the chaps at First Corps. 


Number one on the list was to replace the Army Musician. In the Art of War book it's only supposed to be a single figure, but, if we are going to get the band back together., lets make it a four piece.


Although I painted the original force over ten years ago now and have changed my technique quite a lot since then, I think I've managed to capture a similar style.


I did not have a bolt thrower as a part of the original force but decided that I should add one for the upcoming event. 


It's a lovely model and goes well in the dark red, dark grey and cream theme of the rest of the force.


I also wanted a unit of Straw Dogs in the force, and as part of the Sung range Curteys have some villages that can be used as refugees from a rebel village driven before the advancing army. 


The Straw Dogs will also need some weaponry beyond agricultural implements and walking sticks, so these pair each have a wheelbarrow full of concealed weaponry.


It's been fun revisiting this venerable project. There are at least another four or five unpainted units in the lead pile and maybe I can be tempted into adding the chariots back that I sold.

Wednesday, 27 November 2019

Phillippeville (2)


Despite having guests staying I've been able to do a little more work on accessories for my 1930's/40's French town.

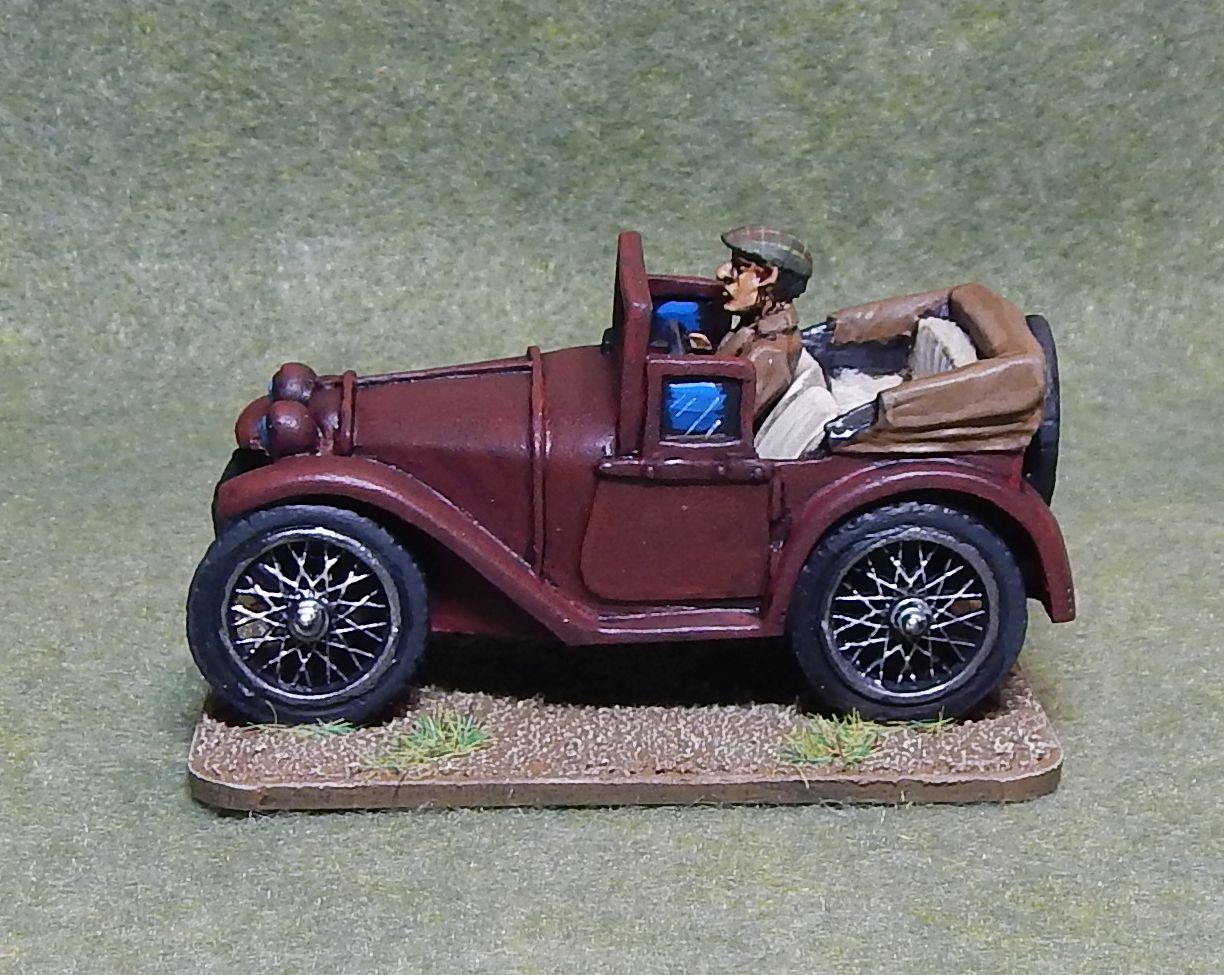
First up is the lovely Austin 7 Gentleman Civil Defence from those chaps at First Corps. Mark has done a fantastic job on this model and it's a real joy to paint. It's right-hand drive so I'd like to think that this is an English journalist covering the phony war who has been caught up in the German advance and is trying to escape back to Paris.


The base-coat is Vallejo Model Colour Black-Red which I think gives a fantastic rich burgundy colour.


You may be able to make out the tweed detailing on his cap, I think this makes a nice period feel.


The car comes with a couple of extra armed figures, but they don't fit my narrative for the model at the moment, but, I'll likely paint them up at at later date and blutack them in for Maximillian 1934 games.


After I started painting the model I realised that the windscreen was actually flash that should have been cleaned up, but I ended up painting it instead.


The base is quite simple, I did not want to overdo the rocks, tufts, etc if it is meant to be on a dirt road.


 I also painted a few more of the accessories in the Rubicon Models Utility & Light Pole Set Three more lampposts and three more telegraph poles.


I would highly recommend this set if you are looking to add some street furniture to your games.


Sunday, 3 November 2019

Phillippeville (1)


Having painted all those Senegalese Tirailleurs I thought I had better get cracking on some suitable terrain for them to fight over, so for the past few weeks I've spent less time painting than usual, but more time working on some terrain.

Earlier this year when I was at Little Wars I picked up the First Corps Fuel pumps and attendant set from Scale Creep and it's sat in the backlog since then as I was never sure of what to do with it.

I finally set my resolve and set about slapping some pain on it last weekend and I'm quite happy how it came out. It will make a nice garage forecourt for the town.


You know how it is, sometimes you don't know you need something until you see it, and that was the case when I read Tamsin's post from a few months ago. That Rubicon Models Utility & Light Pole Set is brilliant.

I've assembled most of the stuff and gotten a few bits painted.

Three lamp posts, the set comes with loads of street signs so I added one to one of the posts. The flagstones on the bases are just cereal box card.


There are components for loads of road signs that you can make and I've done what will likely be the first three of many.


The telegraph poles in this set are much better that the ones I picked up from the model railroad shop a few months ago. The extra components mean you can add street signs and municipal lamps to them. The middle one in this set of three will be 'in town' while the other two are out of town.


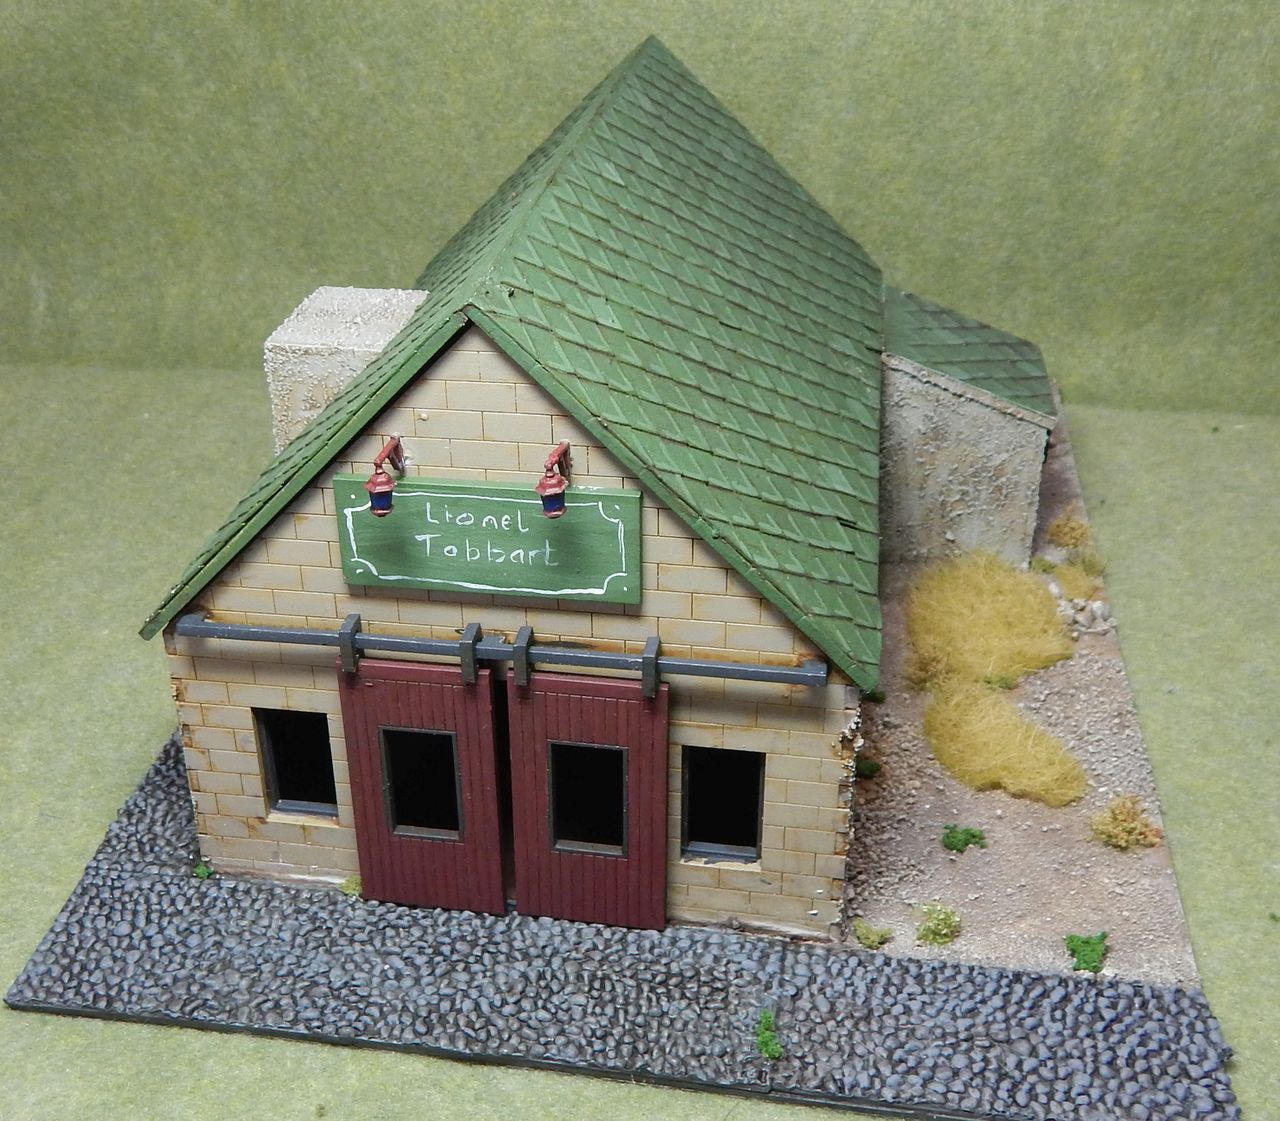
Earlier this year I posted the Warbases workshop that I had built and painted. I thought it needed a little something more so I first of all added a base to it. The cobbles are from Wills Finecast, I picked them up years ago and don't think that they are available anymore.

The rest of the base is done in a rough wasteland with scrubby grass and weeds.


I also perked it up a bit by adding a commercial sign and some of the bracket lanterns from the Rubicon Utility & Light Pole set.


I'm much happier with how it looks now, I think it was a bit 'flat' before. I may print out and add some posters at a later date.


Finally I knocked up three small hills. These are 'pink board' stuck to artists mount board and sealed with decorators caulk. Once that was all dry I textured with fine sand and added some grit and larger rocks before spray painting green and then 'dusting' more patches of colour on with spray paint.

The grit was given a light drybrush and the exposed rock and larger boulders painted Basalt Grey and then highlighted.


Sunday, 8 September 2019

WWII Germans reboot (2)


Another eight of those lovely resin casualty markers from 1st Corps, this time a pack of the German ones. These are probably a bit too 'late war' for the current early/mid-war projects I am working on but nevertheless are a useful addition to the collection and will be used as pinned markers in our Chain of Command games/


I also picked up a pack of telegraph poles from the local model railway shop, these were based, sprayed brown and had the cross-pieces picked out in a rusty steel and the 'pots' painted as porcelain.


But they are a little small, and yesterday I saw on Tamsins blog that Rubicon did a more appropriate 'utility and light pole' set so I placed an order for some yesterday, but these will do in the meanwhile and they already had some use as you can see in some of the pictures of Wednesdays game.


Tuesday, 3 September 2019

WWII Soviets reboot (7)


I also picked up a pack of Soviet casualties from 1st Corps at the Partizan show with the thought of using them to denote a unit status of pinned for our Chain of Command games.

These are really cleanly cast resin pieces and are very easy to paint. I'm also working on some German ones which hopefully shall be done in a few days.


Friday, 30 August 2019

WWII Soviets reboot (6)


While I was at the Partizan show I picked up one of the recently remastered Soviet T-70 tanks from the chaps at 1st Corps to support my Soviet horde

It's a lovely clean kit that takes very little preparation, I washed mine in soapy water and gave it a light going over with a needle file in the few places where it needed a little flash removing.


The whole thing was given a base coat of Rustoleum Camouflage Beige and then blocked in with Vallejo Russian Green. The tracks and exhausts were base-coated in a rusty mix of Saddle Brown, Black and Gunmetal Grey then the whole thing was covered in Army Painter Strong Tone.

Once dried I re-applied the base-coats then did a couple of highlights on the Russian Green by adding successively more Iraqi Sand to each layer and the exhausts and tracks were also highlighted.


I then set about making it filthy with some Tamiya weathering kits, mainly a mud stuck, then mud, dark sand and light sand weathering powders. Then adding water to a rust powder and leaving some rusty bits.

So, a nice clean model that I have made filthy!


Sunday, 9 September 2018

Maximillian 1934: Death Match


Thursday saw another game of Maximilian 1934 in the gaming room. Only myself and Drew were able to make it this week so we played a Death Match with each of us having two $1000 vehicles.

Drew again ran Red Bess, a jalopy with a pintle MG, extra armour (1pt each F&R, L&R) and armoured engine, he also upgraded the driver to be both driving and gunnery '3'. Alongside this he used the newly painted Black Death a jalopy with two light cannon, extra armour to the front and the driver upgraded to be both driving and gunnery '3'.


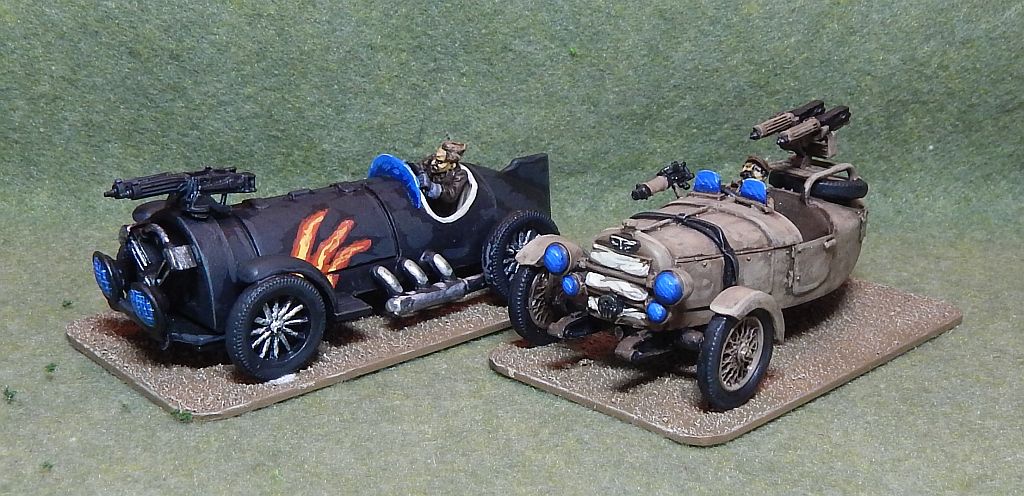
I decided to use my two 1st Corps vintage speedsters. Firstly Sand Piper a buggy armed with three fixed machine guns and with the crew upgraded to driver skill 3 and gunnery skill 4. This was teamed with Green Nasty a jalopy armed with a pair of pintle mounted machine guns and a pintle mounted light cannon, an armoured engine and additional side armour complete the ensemble. Green Nasty does not appear in any photos of the game, but can be seen here.


Game 1 was a short and brutal affair, some deadly shooting by Sand Piper saw Red Bess with a dead driver in the second turn of the game. A couple of turns later Black Death had been cornered and dispatched. We lined them up again!


The second game was much more involved. Both sides were a lot more cagey and the initial shooting was nowhere near so deadly. Red Bess and Sand Piper paired off again and were chiselling lumps off of each other. To avoid a collision Sand Piper slammed on the breaks, Red Bess missed the fate roll and in the ensuing head-on Sand Pipers driver was killed and Red Bess immobilised!

The wide turning circle of Black Death meant that Green Nasty had the initial advantage, but the lack of driver skill soon showed and Green Nasty had rolled a couple of times trying to make tight turns to keep inside Black Death.

Every so often Black Death would swoop by hammering cannon rounds into the stricken vehicle and Green Nasties engine and steering were shot up, but Black Death was taking mounting damage whenever Green Nasty could reply. Finally, Black Death succumbed and Green Nasty was the last car standing, although probably on its side at the time.

A good couple of games again, but long vehicles like Black Death do seem heavily penalised in this sort of scenario, I also think it would have benefit from more players.

Sunday, 12 August 2018

Maximillian 1934 (2)


This week there has been more 'vroom' on the Maximillian 1934 painting with two more cars added.


Firstly a First Corps three-wheeled Speedster that has been customised with a pair of twin-linked Vickers machine-guns and a Lewis gun, like the four-wheeler I painted last week, it's a beautiful model with bags of character.

The machine-guns and luggage rack are from the Eureka miniatures accessories pack.


The light brown is from a base-coat of Vallejo US Tan Earth highlighted up with Light Sand while the rusty exhaust is a mix of Gunmetal Grey and Saddle Brown, highlighted by adding some silver to the mix.


It does not show so well in the photo but the driver has a tweed cap, you do need to look really closely though.


The whole thing was finished using a Tamiya weathering kit.


Next a Eureka Miniatures Roadster that was done in a bit of a hurry to prepare for Thursdays game.

When I did the build on this one I wanted it to look rather fast, so the engine part from the Tribekka model was glued on front as a super-charger and huge twin exhausts were added, I think it certainly has the 'go faster' look.

The sole armament is a pair of twin linked Vickers fixed forward over the radiator. I also added a small cardboard windscreen.


As I wanted to get it ready quickly for our game on Thursday I started with a black base-coat that was highlighted in Black Grey, the interior was done with a cream leather using Iraqi Sand as a base and I decided that to tart her up it was going to need some flames from a mix of Flat Red, Signal Orange and Flat Yellow.

The wheels and exhausts were painted in Gunmetal Grey and chromed with Silver.


Overall I think I managed the 'go-faster' look on this one.


I'll be putting up a report of Thursdays game soon.