Copyright © 2011-2024, Paul Scrivens-Smith

Copyright © 2011-2024, Paul Scrivens-Smith

All rights reserved. This work may not be reproduced, in whole or in part, without the prior written permission of the creator.

Sunday 27 July 2014

Type 97 Chi-Ha


You may have to bear with this post as it is that first time I have attempted a post using the tablet.

A week or so agi I picked up a second hand, but unpainted Type 97 Chi-Ha tank from Warlord Games.

After assembly and cleaning up I first primered with Halfords grey primer then a coat of Army Painter Leather Brown.


I then painted the camo on using Chocolate Brown, Bronze Green and German Camo Beige. The stripe was painted in Golden Brown. The tracks and machine-guns were done in black and the exhausts in rust, a mix of Saddle Brown and Gunmetal Grey.

After being allowed to dry the whole model was washed with Sepia Wash.


Once the wash had dried I then reapplied the base colours, the Chocolate Brown was highlighted by adding sucessive amounts of Beige Brown, the Bronze Green was highlighted by adding sucessively more Gunship Green and the German Camo Beige with Dark Sand.

I went back over the stripe with Golden Brown.


The machine guns were washed with Gunmetal Grey, I then re-applied the rust colour to the  exhausts and added a bit to the tracks. I then picked out the markings in Ivory.

To finish off Itook a Tamiya Model Master kit and added some water to the rust powder then blobbed this on the exhausts and tracks, I then added water to the mud powder and did the wheels and lower hull, finally a dusting of Sand then Light Sand was applied to the upper hull. Probably only took a couple of hours all told.


Saturday 26 July 2014

Re-basing the Gauls

Regular blog viewers will have noticed the paucity of painted troops of late. If you did not know I am soon off on a round-the-world holiday with Victoria so have not wanted to start any new projects. However, I have not been completely idle on the painting front.


After a chat with James and Martin we have decided to embark on some Punic Wars action using the Hail Caesar rules.

Martin has already started on some rather splendid Romans using the Agema plastics. James will be rebasing his Spanish and I will be re-basing my Gauls and Carthaginians.
 I did think it would be rather a faff, but luckily when I originally did these I had clipped the plastic Warlord Games figures from their bases so in most cases it was a matter of just popping them off the base.

Given how old these plastics are - I started painting these back in June 2008 - and how many battles they have fought in I was expecting a lot of damage, there were a few broken spears and swords but I managed to repair most of them and only a single figure was broken off at the ankles when I removed them from the existing bases.

Anyhow, on to the pictures.

I have done four Generals to lead the divisions, these are mainly made up of Gripping Beast characters with a few Warlord Games models.


There are two units of Warlord Games Gallic Cavalry


A unit of Warlord Games female Gallic Warriors


I have done nine more units of the Warlord Games plastic Gauls on 120mm frontages

And then nine bases of these on 40mm frontages, I can use three as a standard sized warband.

Or put them with one of the existing standard units to make a large unit


 There are also six bases of skirmishers, three each of slingers and javelinmen


Here is the whole warband.


I still have my chariots and a few more oddments to do.

A few more images for your enjoyment.


My first taste of Back of Beyond

On Thursday evening, James and I had a break from the norm and he introduced me to the Back of Beyond using the Setting the East Ablaze rules.


James has rather an extensive collection for this so all I had to do was turn up and play my part. I was a British officer, Bailey, who after some spying on the Reds was now exiting Turkmenistan accompanied by a turned Red and his new wife who were attempting to escape into Persia accompanied by a section of White Russian cavalry and a section of Indian scouts and guides.

The Reds were looking to put paid to Baileys adventures and were keen that the information he had would not get away. I had to evade pursuit, find a crossing place and escape into Persia.

Action at the ford
James laid out the table, there was a river running the whole length that I had to cross, a ford was manned by a section of Red infantry while another section would be hidden on the table 12" from the river. A fort was manned by a section of Red cavalry while James had a machine-gun team that he could either place in the sandbagged area guarding the ford or in the fort. A Red armoured car would also arrive from a board edge of James choosing.

Also, my troops were low on weapons, the section of White cavalry had three obsolete rifles, while the Indian cavalry had three modern rifles.

Unless crossing at the designated ford, I would only be able to discover a river crossing on a 4+

After James had noted where the hidden section, the machine gun and the armoured car were I chose a spot on the table edge to arrive. I took the gamble of going for the ford and placed all my troops there. Of course, the machine-gun was plonked down opposite me but I had avoided the armoured car. The section of infantry were pretty central.

We whipped our horses and went hell-for leather at the troops manning the sandbags, making the most of the time they were sorting themselves out. However, the machine-gun soon started up and my cavalrymen started dying. Eventually the White cavalry were dismounted and traded some ineffectual fire with the Reds but all to naught. However, the Indians had much better plans, advancing to close range they dismounted their horses and loosed a volley at the machine-gun causing a crew casualty. Next turn they attempted to charge it but fell well short and were cut down to only a couple men by the fire. However by this time my turned Red had found a crossing point and the fire of the White cavalry started to tell and the machine-gun fell silent.
Just before the machine-gun took its toll

As my remaining men streamed across the crossing point the Communist Commissar launched his cavalry at the remaining pair of Indians who were swiftly cut down, but it was too late, my remaining troops were across the river and into Persia, although a parting shot by some of the Red infantry did kill all but one of my remaining White cavalry.

I had escaped with my three characters and a single cavalryman, this was enough for me to attain a minor victory in the scenario.


Tackling those Prussians again

A tardy blog update from me.


On Tuesday evening I had another rematch against Pauls' Prussians. I changed the list slightly, this time dropping the unit of Dragoons and spending the points on a few upgrades.

Durette - Divisional Commander SR8 - 25pts

de Bruno - Cavalry Brigade Commander SR8 - 25pts

  • Veteran Hussar Regiment - 47pts
  • Veteran Hussar Regiment - 47pts
  • Veteran Horse Artillery Battery - 34pts

Pegot - Infantry Brigade Commander SR8 - 25pts

  • Veteran Line Infantry Battalion (Tough Fighters) - 45pts
  • Veteran Line Infantry Battalion (Tough Fighters) - 45pts
  • Line Infantry Battalion (Tough Fighters) - 39pts
  • Line Infantry Battalion (Tough Fighters) - 39pts
  • Foot Artillery Battery -27pts

Brue - Infantry Brigade Commander SR7 - 0pts

  • Veteran Line Infantry Battalion (Tough Fighters) - 45pts
  • Veteran Line Infantry Battalion (Tough Fighters) - 45pts
  • Line Infantry Battalion (Tough Fighters) - 39pts
  • Line Infantry Battalion (Tough Fighters) - 39pts
  • Foot Artillery Battery - 27pts

Schmidt - Infantry Brigade Commander SR8 - 25pts

  • Veteran Light Infantry Battalion (Tough Fighters) - 48pts
  • Veteran Light Infantry Battalion (Tough Fighters) - 48pts
  • Veteran Line Infantry Battalion (Tough Fighters) - 45pts

Dubois - Cavalry Brigade Commander SR8 - 25pts

  • Cuirassier Regiment - 58pts
  • Cuirassier Regiment - 58pts

Prussians blinded by the sun
Pauls' Prussians were:

Von Steinmetz SR8 Commander 25
  • 12th Infantry Regiment
  • 2 x Large Musketeer Battalions 88
  • 24th Infantry Regiment
  • 2 x  standard Musketeer, 1 x standard Fusilier Battalions 111
  • 1 Foot Artillery Battery 27
Von Perch II SR8 Commander 25
  • 6th Infantry Regiment
  • 2 x standard Musketeer & 1 standard Fusilier Battalions 111
  • 2nd Westfalishes- Landwehr Regiment
  • 1 x Large Landwehr, 1 x standard Landwehr Battalions 74
  • 1 Foot Artillery Battery 27
Von Jagow SR8 Commander 25
  • 9th Infantry Regiment
  • 2 x Standard Musketeer Battalions 72
  • 3rd Westfalishes- Landwehr Regiment
  • 2  x Standard Landwehr Battalions 66
Von Treskow SR8 Commander 25
  • 2nd Dragoon Regiment  44
  • 5th Dragoon Regiment  44
  • ½ Horse Artillery Battery 13
Lutzow SR8 Commander 25
  • 6th Uhlan Regiment (Veteran) 54
  • 1st Kurmarkishes Landwehr Cavalry Regiment 32
  • ½  Horse Artillery Battery 13
When rolling for the properties of the commanders my rolls were very poor:

  • Pegot was Low Independence
  • Brue was High Aggression Low Independence
  • Schmidt was Low Aggression, Low Decisiveness 

Paul also rolled a whole bunch of ones too, but with the Prussian abilities to ignore ones for Decisiveness and Independence he was unaffected:

  • Von Perch II was Highly Decisive
  • Von Jagow was Highly Decisive

Seems that the rules do rather favour the Prussians.

We took it in turns to nominate where our brigades would arrive and after a roll off I took the first turn. Schmidt advanced towards a hedge-line on the left of centre while Brues troops sauntered nonchalantly on to the table. The Prussians started to deploy opposite.
The Landwehr come on

Brue's troops then failed to move for a couple of turns and then blundered, so the Hussars under de Bruno had to leap into action to screen the advancing Prussians, forcing the lead columns into square. Things though were going better on my left. Schmidts troops were winning the fire-fight with the Prussians to the fore while Pegots troops moved around the flank supported by Dubois and his Cuirassiers.

Schmidt gets some sun
Paul was able to steady his troops on my left though and soon the battle lines were drawn there. Unfortunately things were not going so well on my right. The Hussars under de Bruno were charged by the Prussian Dragoons and in a pathetic attempts at putting up a fight, both units were broken for a single hit on the Dragoons.

However it was time for the hammer to fall on my left. Pegot and Schmidts troops stormed into contact and rolled a derisive set of dice, hitting on threes with a re-roll for tough fighters they managed a single hit on their opponents that was duly saved and then rolled a three for the break test and were removed, the supporting unit rolled another three and was removed. I was in trouble. The Cuirassiers managed to also break themselves while taking on the puny Uhlans. It was game over, the mounting casualties on Schmidts Brigade meant that also broke so having lost four brigades of my own and having only broken the Uhlans.

Victorious Prussians
As always, Paul is a pleasure to play against, I am getting a bit annoyed with the piss-poor dice rolling from the start to finish of a game that seems to be endemic when using my Frenchmen though.

Anybody want beautifully painted but ultimately unlucky French army - offers start at about £2000.00 :) (don't worry I'll put them away for a few weeks and forget how shite they have performed over their last few games)
More of those bloody Prussians

There are not very many good photos from the game, strong sunlight across the table did for most of them.


Monday 21 July 2014

The Falange take on a new enemy


For the past few outings the Falange have been pitted against James and his unstoppable T-26 (the bloke is practically Rommel incarnate) however yesterday evening we played at a much more sedate pace. After last weeks game, Greg wanted another try and also bought along his son Ben for a go. Trevs' game had cancelled at the last minute so he also joined in for a Chain of Command taster.

As Greg had only played the once and neither Ben nor Trev at all, I decided we should play the Patrol scenario pitting the Falange against my Milicianos. As there was only a difference in the forces of 5pts the Milicianos added an extra ten men, a LMG and an Army Officer advisor to balance the forces.

Rolling for Force Morale, the Nationalists started on FM9 and the Republicans on FM8.

We set up the table as per the aerial photograph and played out the Patrol Phase, the Nationalist jump-off points shown in blue, those of the Republicans in red.

Rolling for our Force Supports, we would both have 2pts to play with, the Republicans chose El Hombre and an Adjutant and the Falange added a 50mm mortar team.

The Falange were soon deployed, one section behind the houses and another holding the hedges to their right. The light mortar was pushed along the other hedge line. The Republicans started one section on their far right and three more pushed around the buildings, the final section was held in reserve.

The Falange secure the Taberna - always a good move
Soon two Falange teams were ensconced in one of the buildings and were exchanging fire with the Republican team armed with a LMG the other side of the hedge, despite the hard cover, the additional shots from the LMG were soon telling and a few Falangista were down. On the right Trevor took his section and started to skirt around, in an attempt to outflank the Republicans. On their right the team that had deployed there dashed across the open ground under ineffective light mortar fire and was soon in the open woodland.

Ben rolled his Command Dice and another of the many double-sixes he rolled during the course of the game came up so he maintained the initiative and another section of Republicans made a dash across the central road and the Falangista firing from the windows of the buildings tried to capitalise, but were too shook up by the continued LMG fire. The republican Jefe soon joined in that sector coordinating the attacking units and the days were numbered for the Falangistas in the house, we lost two teams and their Jefe causing our Force Morale to drop by four.
Republicans dash to take cover

The Republicans in the wood soon reappeared at the edge and were engaging the Falange team and light mortar although the Falangista were much better shots than their colleagues who had occupied the house and they started to get the advantage.

Things were going better on our right, Trevor had lined the hedge row and was pouring fire into the exposed Republicans massing behind the building, but another set of Republican Command Dice threw a double six to great effect and our Jefe was down and we had to use a Chain of Command dice to avoid taking a Force Morale test. The Republican Jefe was soon redeployed here and sorting out his troops.

Falange secure the hedge line
It was now closing on 10PM and was time to wrap up. Neither side had secured their objectives, but the Republicans were still on their Starting Force Morale of 8 while the Nationalists had been reduced to Force Morale 5 so they were certainly getting the upper hand.

The following image should give some ideas of the manoeuvres.


How the battle panned out
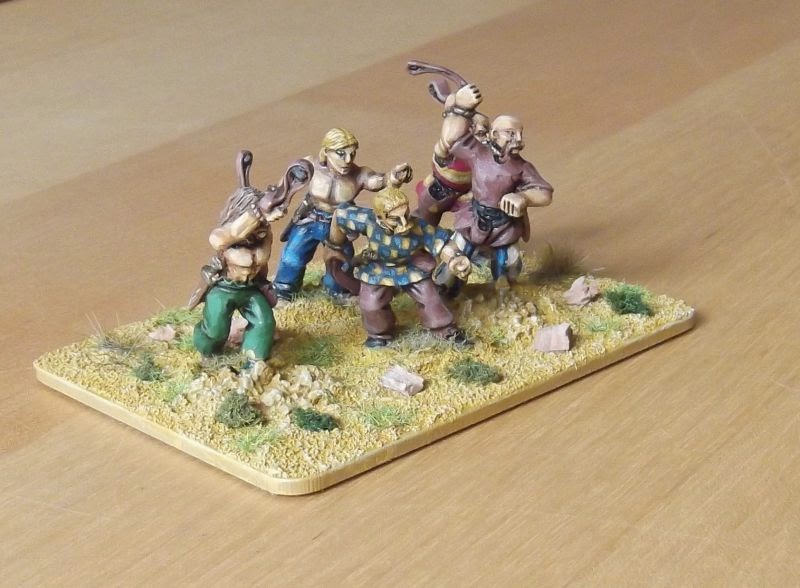
All the figures are painted by myself and are from Empress Miniatures.

Here are a few more images from the game.


Falange take cover

And more cover

Republicans force their advantage

The Republican Jefe coordinates his troops


Wednesday 16 July 2014

The Saga of the three Angry Viking Warlords

The hill between myself and Nick soon became a bloody battleground

Yesterday evening Nick, Martin and myself played a Saga three way at the club using the Feast for Crows scenario. Martin and I had not played for a very long time - actually almost a year to the day - but Nick was fresh from his adventures at the Stoke Challenge over the weekend.

My warband
I took my Vikings as had Nick, Martin had bought both Anglo-Danes and Vikings, it seemed apt though that he should use the Vikings and we could have a brutal mash-up over who called whose wife ugly or who called somebodies pint a poof!

We all picked from the basic Viking lists in the Saga rule book and all chose very different lists. I used my Warlord along with two units of six Hirdmen and a unit of 8 Bondi. I managed to use both the Jarl Sigvaldi and Svenn models that I had painted and never used, both as Hirdmen. The remainder of my models are from the lovely Shieldwall Miniatures range.

Nicks warband
Martin used his Warlord, a unit of four Berserkers, a unit of eight Hirdmen and a unit of eight Bondi, his figures a a mix of Foundry, Black Tree, Artizan, etc. Finally Nick used his Warlord, a unit of four Berserkers, a unit of four Hirdmen, a unit of twelve Bondi and a unit of four Bondi, these are all made from Wargames Factory plastics. As you can see, all very different forces.

We deployed, I was unfortunately second to pick, so ended up sandwiched between Nick and Martins force, this was going to be bloody. Although I was somewhat protected from Martins troops due to the dense woodland in his corner of the table.

Martins warband
Nick and I immediately moved towards each other in an attempt to knock some lumps off before Martin got there and polished off the remainders, I despatched a unit of Hirdmen to try to hold off Martins force.

On the second turn Nick launched his Berserkers into my Hirdmen who locked shields and killed them off for only the loss of a single Hirdman. My Hirdmen then pushed on into the large unit of Bondi but were driven off with a couple of casualties. My Bondi then engaged Nicks Bondi, building up their fatigue and killing a couple before my remaining Hirdmen finished them off.

Prepare to die Berserker!
Nick then committed his Hirdmen to the fight killing the last of mine on that flank. By now my other unit of Hirdmen were engaged with Martins Bersekers who fared much better than Nicks, for the loss of three figures each. I was getting very thin on the ground although had killed loads of the enemy. With only my warlord on one flank I did a do-or-die move and charged into Nicks warlord and we traded blows ineffectually for a couple of turns before my warlord got the better of his and despatched him. However it was turn five and by now Martins Hirdmen had finished off the last of mine, I was down to the solitary warlord. Turn six and I moved my warlord to attack Martins remaining berserker and both were killed in the ensuing scrap.

My warlord does for Nicks
As I had no figures left, the final turn was played out between Martin and Nick, the Hirdmen clashed and Nicks remaining three were done for, but managed to take out four of Martins in return. It was time to tot up the casualties.

Despite being up against it in all the combats I had managed to kill:

  • Nicks Warlord, 1 Hirdman, 4 Berserkers and 12 Bondi plus of Martins 4 Berserkers and 3 Hirdmen.
  • Nick killed of  mine 6 Hirdmen and 8 Bondi and of Martins, 4 Hirdmen.
  • Martin killed my Warlord and 6 Hirdmen and of Nick, 3 Hirdmen.

I was a clear winner, despite losing all of my troops in the process.


My mighty pile of kills


Martins collection of kills

Nicks pile of kills