Copyright © 2011-2024, Paul Scrivens-Smith

Copyright © 2011-2024, Paul Scrivens-Smith

All rights reserved. This work may not be reproduced, in whole or in part, without the prior written permission of the creator.

Wednesday 21 February 2018

The first Battle of Old Sauk Meadows


Thursday evening saw the next instalment of our Sharp Practice American Civil War series. Usual leader of the Union Sharpshooters, Captain Binsack called off with a bad attack of bone spurs, Seth was unable to attend. It would just be down to myself and Bruce.

I reused the forces from our last game:

Confederates

  • Leader, Status III 
    • Leader, Status I  
    • Three groups of 8 Infantry, Rifled Muskets 
    • Musician
    • Ammunition Cart
  • Leader, Status II 
    • Three groups of 8 Infantry, Rifled Muskets 
  • Leader, Status I 
    • One group of 6 Skirmishers, Rifled Muskets 
  • Leader, Status I 
    • One group of 6 Skirmishers, Rifled Muskets 


Union

  • Leader, Status III 
    • Leader, Status I 
    • Three groups of 8 Infantry, Rifled Muskets 
    • Musician 
    • Holy Man 
  • Leader, Status II 
    • Leader, Status I
    • Three groups of 8 Infantry, Rifled Muskets 
  • Leader, Status I 
    • One group of 6 Skirmishers, Rifled Muskets 
  • Leader, Status I 
    • One group of 6 Skirmishers, Rifled Muskets 
  • Leader, Status I 
    • One group of 6 Skirmishers, Rifled Muskets 

The Union have quite a few more leaders and an extra group of skirmishers, but their troops are Surly and the Confederate infantry do get Rebel Yell, although it seems precious opportunity to use it.

I set out the table as below and we would be playing a meeting engagement. Reusing the last forces and playing a meeting engagement? Lack of planing? Guilty as charged!


I did get to use some of the terrain I recently made and think it looks quite good in place.


As we are playing quite large games, one thing I am trialling is putting an extra blank chit/card into the deck/bag if either player has more than 10 Leader / Command cards in the deck, the blank card has two roles:

  1. If drawn as the first card out of the deck it counts as a Tiffin
  2. If drawn at any other time it breaks a sequence of Command Cards counting towards a random event.

Bruce took the Union force and myself the Confederates. We both rolled up a Force Morale of 11, it may be a long game!

In a departure from our usual opening moves, both sides bought their formations on in column in a better effort to get them into position before they deployed into line, and despite the long ranges we have with the Minie rifles it seems to be a better option.


Both sides moved to get advantage of ground in the centre with both forces using skirmishers in the rougher terrain on the flank. The 'spare' unit of Union skirmishers were pushed far out on the right where they made their way through the farmland in the hope of outflanking the Confederates.

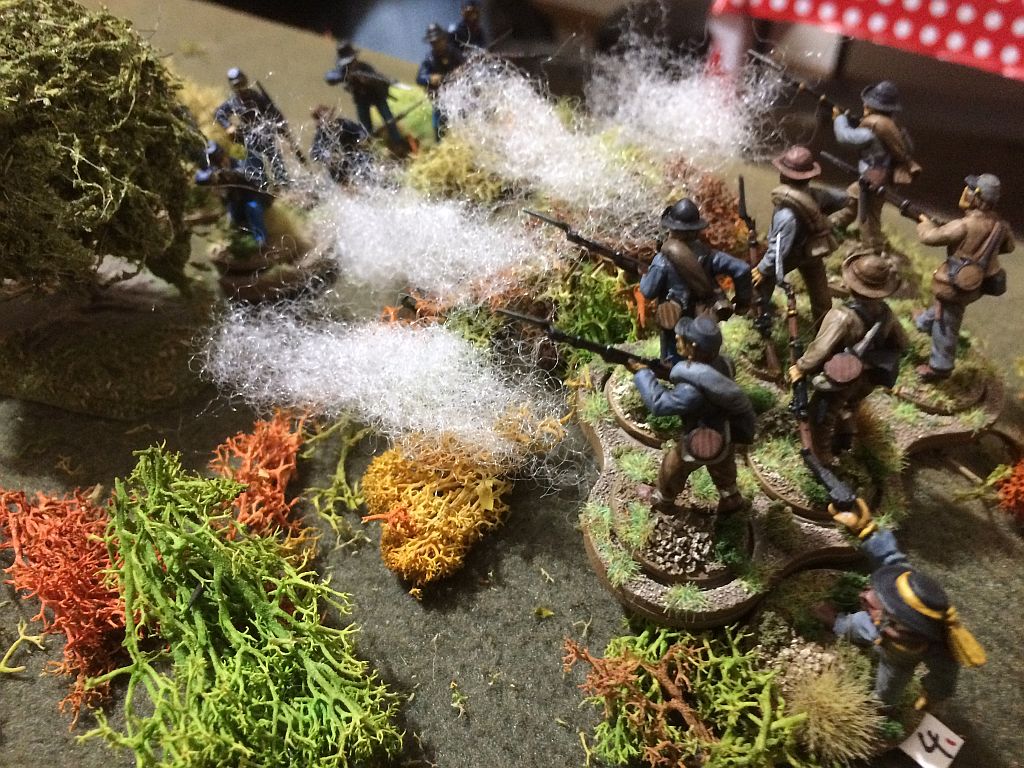
The Confederate initially pushed one of their columns into line and both Union forces deployed blasting it and forcing it to fall back through the end of their second line carrying on some shock. But this left the Confederates with one line still not having fired its initial volley and this was used to some devastating effect on the Union line led by their commanding officer, who then suffered the indignity of a Random Event leaving them low on ammunition.


The Confederate skirmishers now came into their own, with four out of six shots hitting the Union line, Bruce allocated the hits amongst his troops and subsequently rolled four sixes - ouch! We then rolled for officer casualty and the Major was shot dead from his saddle!


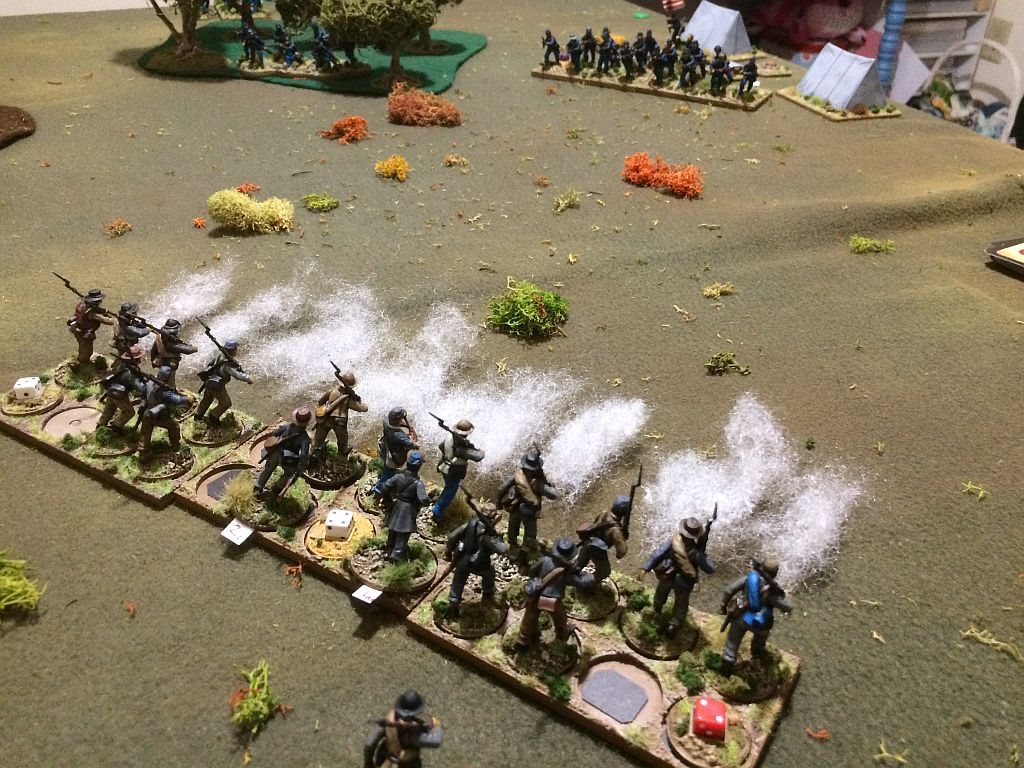
The Confederates took full advantage of this, as the first line fell back to rally shock, the second line accumulated enough Command Cards, rallying shock, unleashing their volley and with a whoop and a holler throwing themselves on the disorganised Union line who were forced back in some disorder.


The flanking Union skirmishers took their opposite number in the rear causing them to break and run, but another Rebel Yell from the Confederates saw the main Union line shatter and their morale collapse with it.

Finally a victory from the Confederacy! Rumour has it that Captain Binsack has recovered from his debilitating bone-spurs and is spoiling for revenge!


American Civil War: Confederates (10)


You may recall that chum James sent me a pack each of the Perry Miniatures mounted Union and Confederate Generals for my birthday last month. The Union chaps were turned around pretty quickly, but the Confederate Generals have been waiting their turn in the painting queue.

This week I managed to finish them off, giving them a spray of varnish this evening before taking the obligatory photos for the blog.

The first fellow looks to be quite the veteran so I gave him a set of grey moustaches and whiskers that I think go quite nicely with his mid-blue trim.


The second chap shall do duty as a dashing cavalry commander to lead the Confederate horse.


 Our final commander is quite the dandy, I imagine he left the family plantation at the head of his locally raised unit and has now attained a high rank.


Sunday 11 February 2018

ACW terrain building session


This week I've been working on more terrain for our American Civil War games and have been quite productive in knocking out 4ft of snake-rail fencing and a couple of fields.


Yesterday I visited the excellent Madison Artists & Craftsman Supply store in town and found some Wee Scapes Corn Stalks, they are quite prices at about $6.00 for a dozen stalks , but I purchased a couple of packs to make this small field with a stone fence.


I drilled out the plywood to insert the stalks, so hopefully it shall not get too damaged in play and transit. The stone fence is just made from a pack of small rocks I picked up at the same time.


I also made a slightly larger field with a post and rail fence surrounding it. The crop are some Tajima Miniatures small shrubs that I had that I never found a use for. The fence, posts and gate are made from split coffee stirrers.


Finally I made four sections, each about 12" long of snake-rail fence. This is almost entirely made of 3/16 dowelling cut into 80mm lengths and slightly chamfered at each end in a pencil sharpener. The gate is again made from split coffee stirrers.


AI'm quite looking forwards to using these additions in Thursdays game.


Andalusian Jinetes


I've not painted anything for the El Cid project for quite some time and these chaps have been sat on top of my paint cabinet for almost a year. The riders were finished last February and the horses just needed high-lights and basing.

So, after a year gathering dust I made the decision to pause painting the ACW collection for a while and instead make a small effort to get these done.


All the figures are from the Gripping Beast range and are lovely figures to paint. Although you'll note that in the intervening year some clumsy oaf has knocked a foot off the chap in the red tunic. One of the horses is of the old-style and not as nice as the newer ones.


These fellows shall either be a single unit of Jinetes when playing To The Strongest or Hail Caesar or half a unit when playing Warhammer Ancient Battles.


American Civil War: Confederates (9)


A small update on the American Civil War collection this week as another group of eight Confederate infantrymen join the growing forces. This group are painted in a mixture of greys, butternuts and browns and when they are mixed in with the existing troops shall add more variety to the force.


All are from the Perry Miniatures ACW Confederate Infantry set and are posed at right shoulder shift. The palette for these was mainly:

  • Neutral Grey
  • Butternut (a mix of German Camo Beige and Flat Earth)
  • Chocolate Brown
  • Flat Earth

When I did the highlights on about half of the Neutral Grey rather than adding Pale Grey I added Pastel Blue to give a blueish hue, not sure it shows up in these photos though.


The unit base is from Warbases I buggered up on this batch though, previously I used a piece of flex-o-metal in the slot, this time though I glued in some 'fender washers' they are a bit thick and the figures stand quite proud in the holes. 


Here are a few close-ups of a couple of the individuals. The photos are not that good, I could not get the lighting right today.


Sunday 4 February 2018

Captain Fullers assignation

If you followed the link to this post from TMP please file a content violation report on that forum. Tango01 seems to think that copyright laws don't apply to him.
To reiterate the notice on this blog: 

Copyright © 2018, Paul Scrivens-SmithAll rights reserved. This work may not be reproduced, in whole or in part, without the prior written permission of the creator.


Captain Fuller, an intelligence officer on General Laughton's staff keeps his assignation with Molly, unbeknown to him she's a Union agent so as well as a dose of Cupids Measles she also slips him a sleeping draught.


A prisoner escort led by Lieutenant Appleyard arrives to escort Fuller back to the Union camp where he can be interrogated in the hope of disclosing the rebel plans.


A force of Confederates under Major Archibald Smythe is swiftly dispatched to recover Captain Fuller, shall they arrive in time?

Thursday evening saw us playing a Rescue Scenario, a Confederate officer had been betrayed and captured and would be escorted back to the Union camp. Could the Confederates disrupt them, or would Captain Fullers fate be sealed?

Seth played the Confederates while Drew played the Union, I drew the cards and ensured that the game would run smoothly. I set up a table with the farm where Captain Fuller was seized at one end and the Union camp at the other, the thunder-box would serve as another Union deployment point. I put my hills under the cloth but if it's not too obvious in the photo there is a scrubby hill in the top left and the centre of the table. The Union camp is just out of shot at the bottom left.


Both sides would have 104pts of troops available.

Confederates
  • Leader, Status III 
    • Leader, Status I  
    • Three groups of 8 Infantry, Rifled Muskets 
    • Musician
    • Ammunition Cart
  • Leader, Status II 
    • Three groups of 8 Infantry, Rifled Muskets 
    • Leader, Status I 
    • One group of 6 Skirmishers, Rifled Muskets 
  • Leader, Status I 
    • One group of 6 Skirmishers, Rifled Muskets 

Union
  • Leader, Status III 
    • Leader, Status I 
    • Three groups of 8 Infantry, Rifled Muskets 
    • Musician 
    • Holy Man 
  • Leader, Status II 
    • Leader, Status I
    • Three groups of 8 Infantry, Rifled Muskets 
  • Leader, Status I 
    • One group of 6 Skirmishers, Rifled Muskets 
  • Leader, Status I 
    • One group of 6 Skirmishers, Rifled Muskets 
  • Leader, Status I 
    • One group of 6 Skirmishers, Rifled Muskets 
The Union force also has a prisoner escort of:
  • Leader, Status I 
    • One group of 8 Infantry, Rifled Muskets 

Lieutenant Appleyard and his section of eight men are detailed to escort Captain Fuller to the Union camp before the Confederates can either recapture him or over-run the Union positions.

The Confederates moved to block Lieutenant Appleyard and his prisoner escort Major Smythe and his main body of infantry deployed and began a steady advance across the field, there was much dressing of lines and little progress made (some terrible die were rolled for movement!). In response the Union main body led by Major Peach and Sergeant Lacy deployed - from the thunderbox - and form column of route to make their way towards the back of the Confederate lines.


Two of the units of Union skirmishers and a Confederate skirmisher unit contested the knoll on the Confederate right, but after a brisk bout of melee the Union troops were left in position of the high ground and were able to pour fire onto Smythe's men.


In an effort to block Peach and the Union main body Sergeant Pearson took his skirmishers around the back of the Union force and the flanking fire caused Peach to abandon plans to move into the Confederate rear and instead deploy and head towards the main fight.

Captain Renton deployed the remainder of the Union force before the camp and was soon in a brisk firefight with Smythe's men, with volley fire from the front and accurate skirmishing from the knoll on their right the Confederates stalled. To shore up the situation, Captain Stallard deployed his forces to intercept the Union main body and a sharp firefight ensued with Peach shot from the saddle wounded.

Stallard follows up with a charge that sees the Union forces pushed back in disorder.


Unfortunately, the Confederate efforts were all to nought, with all their troops engaged with the enemy Lieutenant Appleyard and his prisoner escort were able to make it to the camp and Captain Fuller was handed over for interrogation.

Both sides were on a Force Morale of 5 but as the prisoner had been successfully escorted to the camp it was another victory to the Union forces, maybe the Confederates just are not trying hard enough, maybe the sun is shining on the Union!


More photos from the game, many courtesy of Drew