Copyright © 2011-2024, Paul Scrivens-Smith

Copyright © 2011-2024, Paul Scrivens-Smith

All rights reserved. This work may not be reproduced, in whole or in part, without the prior written permission of the creator.

Sunday 22 April 2018

Poilu Reinforcements I


This year I'm planning to attend Historicon and speaking to the chaps in Palatine we initially planned a Big Chain of Command game using our WWI collection. That's not likely the case now and we shall be doing Spanish Civil War!

I'm a bit light on French Infantry so sent off to Brigade Games for a couple more packs of riflemen and a pack of Chauchats.


This weeks output is fifteen of the twenty four figures that I bought, using my standard palette for Poilu in horizon bleu.

When I made the order I had it in my head that I'd have a use for more Chauchat teams, although on reflection I really don't think I needed another four, although they do add some variety to the Woodbine Designs ones that I painted previously.


I do rather like the prone Chauchat team that comes in the pack, I added a section of barbed wire for them to take cover behind.


The basing is done with a mix of pumice gel, grit and static grass mixed up with Flat Earth paint and slathered on the bases, later dry-brushed, in this case with Iraqi Sand, although looking at other figures in the collection I probably should have used Dark Sand!


The few muddy puddles that you see are just PVA glue that is given a coat of gloss varnish after the dull-cote has been applied.

You'll see from the above base that the two figures are quite distinct from each other and I reckon that Brigade Games used different sculptors for each. While they are both well sculpted models, I'll avoid mixing them on the same bases.


It's over a year since I last painted any Poilu and even longer since I last played - must try harder!


Thursday 19 April 2018

American Civil War: Confederates (12)


More Confederate reinforcements for our Sharp Practice games this time along with a few farm animals and somewhere for the artillery crews to hide.

I finished off the last dozen figures from the second box of Perry Miniatures Confederate infantry, adding an officer, a standard bearer, sergeant, two drummers and another seven infantrymen/skirmishers.


All painted using my usual Confederate palette that you can find here although rather than using Vallejo Sepia was, I experimented by using Army Painter Strong tone on four of them to see the effect.


The standard is from Warflag printed off at the local Office Depot. Not sure what happened with the chap in the red blanket, my fading eyesight did not notice the limp of crud on it and I appear to have painted around it, only noticing after I took the photos.


I also added a few more farm animals from Warbases with a donkey and a few more chickens. We have yet to have a chicken stampede in any of our Sharp Practice games, but I am looking forwards to that day!


Finally an artillery position for our gunners to shelter behind, knocked up from four Renedra gabions and a few pebbles. I've got a couple more of these in the pipeline.


WWII British Airborne, Special Forces and Resistance


This week I completed a few more WWII figures for chum Tony. A mix of British airborne, special forces and French partisans.


Three more British airborne in Denison Smocks, I think the two on the right are old Bolt Action Miniatures, not sure of the guy with the PIAT.


Five Bolt Action Miniaures airborne/special forces in a mix of jumpers and parkas. One chap has a French marine bonnet, another is kilted.


Finally two French resistance guides, one has an old WWI horizon bleu Adrian helmet. Both have tricolour armbands and are armed with liberated German weapons including a PanzerFaust. I am pretty sure that these are from Warlord Games.


They shall be winging their way over to Blighty in the next couple of days.


Sunday 8 April 2018

The second Battle of Sauk Meadows


Thaddeus Markgraf, photographer to royal houses of Europe captures the events of the day.
A week last Thursday Seth came around to mine and we played another game of Sharpe Practice using the American Civil War collection. Seth had bought with him a rather nice 19th Century photographer - Dixon Miniatures I think - to record the event.

We played the Attack on an Objective scenario, I defended with the blue-bellies and Seth attacked with the sucesh.

Confederate troops sweep unopposed up the turnpike.

It's been over a week, and I've been away on business since, but reading my scribbled notes, the forces were:

Union

  • Leader status III
    • Leader status I
    • 4 groups of 8 infantry with rifled muskets
  • Leader status II
    • 3 groups of 8 infantry with rifled muskets
  • Leader status I
    • 1 group of 6 skirmishers with rifled muskets
  • Leader status I
    • 1 medium gun with 5 crew

Union artillery, primed and ready to unload canister upon the Rebels

Confederates

  • Leader status III
    • Leader status I
    • 3 groups of 8 infantry with rifled muskets
  • Leader status II
    • 2 groups of 8 infantry with rifled muskets
  • Leader status I
    • 1 group of 6 skirmishers with rifled muskets
  • Leader status I
    • 1 group of 6 skirmishers with rifled muskets
  • Leader status II
    • 1 group of 8 cavalry with mixed weapons
  • Leader status I
    • 1 medium gun with 5 crew
We used the 1864 lists so that there was not such a huge disparity between the starting points values of the Union and Confederate forces. The Confederates started with a Force Morale of 11 while the Union started with a 9

Captain Joshua Scrivener encourages his troops to the fore.

As we are playing quite large games, one thing we are trialling is putting an extra blank chit/card into the deck/bag if either player has more than 10 Leader / Command cards in the deck, the blank card has two roles:


  1. If drawn as the first card out of the deck it counts as a Tiffin
  2. If drawn at any other time it breaks a sequence of Command Cards counting towards a random event.


Union skirmishers take position on the scrubby knoll.

The early phases of the battle were a huge success for the Confederacy, supported by a screen of skirmishers the main force of the infantry were pushing up the road towards their objective with no Union troops to be found. The Confederate horse also started a sweep out to their left flank.

Eventually though the Union troops started to trickle on to the battlefield and it seems that the grey (and brown and other shades) tide may not have such an easy journey.

And still the Rebels pushed on

Detaching off the sergeant with a group of infantry to cover their right flank, the Union captain pushed his main force through the woods in front of his objective, while the cannon and skirmishers covered the left.

Soon the Union skirmishers were taking pot-shots at the advancing rebels and some were soon seen falling in their ranks.

Lieutenant Harry Parkinson leads his Confederate horse in a brutal charge on the Union right flank.

In a flurry of activity the Union gun was wheeled into position and loaded with canister (four command cards put to good effect), but, it was unable to fire during the course of the game and the rebel skirmisher fire was soon racking up shock points on the crew.

The Union foot pushed through to the fore of the woodland and let rip a volley into the Confederate ranks, slowing their implacable advance.

Parkinson is mortally wounded and his troopers retreat in disarray

The Confederates came on and their cavalry raised to the gallop and swept into the single group of infantry protecting the Union right flank. Fisticuffs ensued and the Confederates had a big advantage of combat dice. But, it was all to nought, the Confederate roll was terrible, for the loss of no Union troops the Rebel Lieutenant was mortally wounded and three more of his riders were felled.

The horse turned tail and ran from the field.

Unable to overcome stiff resistance the Confederates withdraw.

With a strong Union presence covering their objective and their best chance of capturing it retreating in disarray the Confederates broke off the attack and retreated licking their wounds.

I'll not be able to get a game in now for a few weeks, but more troops are on the painting table ready to join the next battle.

The Confederate left recover their dressings after pushing through the fields.

Captain Nathaniel Phillips sees his plan come to nought and orders the withdrawal

Newly painted figures often fare badly, the Confederate gun only activated the once!


Sunday 1 April 2018

Not tidying away the El Cid collection


After Thursdays game of Lion Rampant, rather than putting the El Cid collection away I decided to get it all out and run through a few ideas that I had for using Hail Caesar for the period and also 'just because' 

The El Cid forces I have are a huge collection of figures and I've been playing a lot of skirmish games of late, it's good to see forces on the table that look like armies.


In previous games using the 'official' lists the Spanish cavalry have pretty much bowled over the Berber infantry and that did not feel right to me, so, I equipped all the Berber foot with Long Spears and made the Berber foot with hippo-hide shields Stubborn. If you were using the lists both forces came out at about the 440pt mark.

I set up the table pretty sparse with just a few rolling hills and then dropped the forces on. The Almoravids were just a solid line of infantry with light horse on each flank while the Christians presented a solid front of Caballeros backed up by their infantry with the Andalusian content holding up their right flank.


Berbers

Left Flank
Unit Clash Sustained Short Long Morale Stamina Special Points
Berber light cavalry with spears and javelins 5 3 2 0 6+ 4 Feigned flight 19

Left Centre
Unit Clash Sustained Short Long Morale Stamina Special Points
African Mercenary medium infantry with long spears 7 7 3/0 0 5+ 6 "Tough Fighters
Stubborn" 31
Berber medium infantry with mixed ranks of long spears and bows 6 6 3 2 5+ 6 Stubborn 30
Berber light infantry with bows 5 5 3 3 6+ 6 23
Berber skirmishers with javelins 3 2 2 0 - 4 11


Right Centre
Unit Clash Sustained Short Long Morale Stamina Special Points
Black Guard medium infantry with long spears 7 7 3/0 0 5+ 6 "Tough Fighters
Stubborn" 31
Berber medium infantry with mixed ranks of long spears and bows 6 6 3 2 5+ 6 28
Berber light infantry with bows 5 5 3 3 6+ 6 23
Berber skirmishers with bows 2 2 2 2 - 4 12
Berber skirmishers with javelins 3 2 2 0 - 4 11


Right Flank
Unit Clash Sustained Short Long Morale Stamina Special Points
Berber light cavalry with spears and javelins 5 3 2 0 6+ 4 Feigned flight 19
Berber light camel riders with spears and javelins 4 3 2 0 6+ 4 17


Christians and Andalusians

Left Van
Unit Clash Sustained Short Long Morale Stamina Special Points
Spanish Caballeros medium cavalry with spears and javelins 8 5 3 0 5+ 6 27
Spanish Jinetes light cavalry with spears and javelins 5 3 2 0 6+ 4 Feigned flight 19


Right Van
Unit Clash Sustained Short Long Morale Stamina Special Points
Spanish Caballeros Hildagos heavy cavalry with spears and javelins 9 6 3 0 4+ 6 Tough Fighters 31
Spanish Jinetes light cavalry with spears and javelins 5 3 2 0 6+ 4 Feigned flight 19


Right Flank
Unit Clash Sustained Short Long Morale Stamina Special Points
Andalusian medium infantry with spears 6 6 3 0 5+ 6 Levy 20
Andalusian skirmishers with bows 2 2 2 2 - 4 11
Andalusian Jinetes light cavalry with spears and javelins 5 3 2 0 6+ 4 Feigned flight 19

Support
Unit Clash Sustained Short Long Morale Stamina Special Points
Spanish heavy infantry with spears 7 3 3 0 4+ 6 26
Spanish medium infantry with mixed ranks of spears and bows 6 6 3 2 5+ 6 Levy 22
Spanish light infantry with crossbows 4 4 3 3 6+ 6 21
Spanish skirmishers with bows 2 2 2 2 - 4 11
Spanish skirmishers with slings 2 2 2 2 - 4 11

I would be playing solo, the Hail Caesar mechanism of issuing orders and testing for success lends itself to solo play. Randomising for first turn the Spanish were off, true to form the Caballeros surged forwards leaving their infantry and Andalusian allies wondering what happened.

The Almoravids countered pushing their infantry forwards with both wings of light horse surging around the flanks of the Hildagos. The Christian cavalry continued their advance and the Spanish foot reacted to the Berber light horse deploying their skirmishers and crossbow against them while pushing up with the rest to support the Caballeros.


The action was now starting to develop, the Andalusian contingent was able to fight off the Berber horse before them, driving them back in some disorder with the first unit of the game being lost - one of the Berber horse. On their left the Christian foot were also able to keep the Berber cavalry and camelry at bay with concentrated bow fire and support from the Jinetes.

In the centre the Caballeros prepared their charge with a barrage of javelins driving off the African skirmishers while the Berber foot responded with barrages of bow fire.


Now was the time for the decisive point of the battle, the Caballeros committed a unit on the left to charge down the Berber archers while in the centre two units of Caballeros Hildagos crashed into the Almoravid foot.

On the left the Caballeros broke and ran down the Berber bowmen leaving the Almoravid right flank wide open.


However, in the centre the Caballeros Hildagos who charged the Berber foot and African Mercenaries fared much worse. The long spears of the Berber foot were able to disorder the unit opposing them and both they and the African Mercenaries fared much better in the resultant combat and even though they only managed small wins in each combat terrible morale tests for the Hildagos saw both units broken.


 With the Spanish's only heavy cavalry division now out of the game there seemed little point in continuing, the Caballeros on the left would have been able to exploit the open flank for so long before the Spanish centre was rolled over.

I only played for a few hours on and off but it was worth it to get the collection on the table again. I do think that I would benefit from another table though, there is rather a lot of stuff to squeeze into a 6ft frontage these days.

Some more imaged from the game:

Caballeros Hildagos with supporting Jinetes

Caballeros Hildagos close on the Almoravid lines


Cresting the hill the Caballeros prepare to fall on the Berber foot 

Caballeros and Berbers


And a view from the other side.


Andalusians prepare to repel the Berber horse on the right flank.


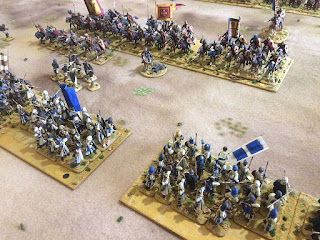
The action in the centre

Berber cavalry and camelry under fire on the Spanish left.


Berber light horse

The first casualties of the game.