Copyright © 2011-2026, Paul Scrivens-Smith

Copyright © 2011-2026, Paul Scrivens-Smith

All rights reserved. This work may not be reproduced, in whole or in part, without the prior written permission of the creator.

Showing posts with label France 1940. Show all posts

Saturday, 6 November 2021

Francs Tireurs


The last time I played a France 1940 game with James I used a Francs Tireurs and although it's only a game mechanic thought it would be a good idea to have a figure or two to represent them so decided to pick up pack of them from Crusader Miniature.


The first pair are armed with a shotgun and a captured MP40, while the second pair have a rifle and a sub-machinegun.

I painted some of them with vintage Horizon Bleu kit left over from the last war.


They are a lovely set of figures, hopefully the France 1940 stuff will get a run out again in teh not too distant future.

Saturday, 31 July 2021

Tirailleurs Sénégalais into action


It's been a long time coming, but the Tirailleurs Sénégal that I painted back in 2019 finally hit the table on Thursday evening when James came around to ours for some dinner and a game of Chain of Command.

I had already set up the table that morning, we just threw a few extra trees on.

While Victoria put the finishing touches to the chili James and I randomised that we would be playing the Hasty Defence scenario. James would be attacking using a platoon from an Army Group A Second Wave division while I would defend with my Tirailleurs Sénégalais.

For my supports I chose a Hotchkiss MMG, an adjutant and some Francs Tireurs. James had much more to spend (14 points to my six) and chose a MG34 MMG, an adjutant, a fifth columnist Shabby Nazi Trick, a pre-game barrage, a section of entrenchments and a Panzer III.


With dinner over we settled into the game.

I got quite far forwards in my Patrol Phase and the Germans ended up with a cluster of three Jump-off points quite close together while I had a couple in the village, one each on the left and right side and another behind a wall on my left flank.


The Germans took the first move and although my Francs Tireur caused some initial disruption they were soon leapfrogging forwards with one unit on overwatch while another advanced and the preliminary bombardment kept my heads down. 


It was then revealed that the helpful garage mechanic was actually a dastardly fifth columnist constantly misdirecting my chaps trying to form a defensive line.

My plans were also rather thwarted by the number of times that Bosche maintained the initiative! 


However, I was able to eventually get some troops into action and they cut up badly a section of Germans caught in the open, leaving only a handful of survivors who dashed to cover behind a high wall - loads of fives and sixes thrown, but bugger all in the way of shock!


Oh merde!, Fritz revealed his hand and a lone Panzer III was pushed up in support, my lightly armed Senegalese would not be able to offer much resistance against this beast.


Those badly cut up Germans were able to link up with the fifth columnist and eliminate the jump-off point before being finished off by my Hotchkiss as they tried to make cover.


In the end although I had wiped out completely one section of Germans and wounded the CO, the combination of a lower starting force moral (9 vs 11) and the loss of the jump off point, a section of Tirailleurs and the V-B section saw my force morale collapse to zero.

I really enjoyed playing Chain of Command again and using the Tirailleurs Sénégalais for the first time.


Saturday, 28 December 2019

Phillippeville (6)


A collection of miscellany from me today, I need to work more on my planning.

Before the challenge started I got built and primed in preparation a whole load of terrain and the last of that was painted today. Firstly, five six inch long sections of fencing that I made on tongue depressors that will come in handy for marking boundaries or denoting road edges, etc. I had ran out of the tongue depressors after this build but a trip to Michaels has furnished me with enough to build a load more of this stuff.

These were made with matchstick for the posts with split coffee stirrers for the planks. The gates are made from lolly sticks as per the instructions in the great Setting the Scene books.


At the same time as the mass terrain build I also built a couple of hills, the large one is about nine inches across and two inch deep and the smaller one is about a six inch diameter an one inch deep.

I bought a hot wire cutter last month so was determined to get some use out of it. The hills look a bit of an odd colour in these photos, but blend in quite well with my usual gaming terrain cloth.


I've not been buying figures for a few months now, but that has not stopped Victoria picking me up a few treats. Back in August we were in the UK and attended 'The Other Partizan' where Warbases furnished her with the ideal gifts for me.


The first one painted is the stag and hind from the Red Deer set, I can see though that at some stage in the process I managed to chip some paint off of his magnificent antlers, likely will get touched up before they see some use on the gaming table.

For an idea of size this pair are on a 40mm base.


She also picked up for me a splendid pair of Longhorn Cattle that will come in very useful in our games. I now have quite a lot of potentially stampeding livestock for our Sharp Practice games.


This pair are mounted on a 50mm base to give an idea of the size.


Tuesday, 24 December 2019

The Stable - Phillippeville (6)


I'd built and painted a small stable with a walled and fenced area a couple of weeks ago and quite liked how it came out, so set too to make another one for the challenge.

The donkey was from Warbases and was a gift from Victoria


The stable is made out of artists mount board then planked with cut coffee stirrers. The fence posts are matchsticks while the fencing is also split coffee stirrers.


The gate, like that one from the orchard is constructed as per Pats instructions. The roof is mount board painted as tar-paper held down with some planks of wood and a boulder.


The last thing painted today was a couple of wall sections made from small pebbles stuck onto tongue depressors, these are quite an easy build but I think they look quite effective and come in very handy.


These are also part of my first entry in the Analogue Hobbies Painting Challenge for this year, if you are not aware of the event I suggest you pop over there.

I hope to get a couple more of these fabricated over the next few weeks.

Monday, 23 December 2019

The Shack - Phillippeville (5)


The next piece of Phillipeville is the re-purposing of a rather horrible Sarissa Precision house from their Americana range that I bought many years ago when we were playing some Dead Mans Hand games.

This took rather a lot of prep-work to get it more like I wanted it. I'm not bothered about having access to the interior, so, the windows were filled in with cereal box to be painted as glazing and the roof stuck down permanently.


I added barge boards and planking to cover the bad corner joints, the stone effect chimney and footings were completely redone by gluing on small chips of stone then rendering it with Polyfilla, a gate and fence were added at the back to create a small yard area.


I'm much happier now with how it looks than the original kit.


This is part of my first entry in the Analogue Hobbies Painting Challenge for this year, if you are not aware of the event I suggest you pop over there.

The Orchard - Phillippeville (4)


Inspired by the orchards in Setting the Scene II I've made a couple of section of walled orchard, per Pats recommendations, the tree armatures are from Woodland Scenics while the walls were carved out of high density pink foam board. The gate was made using the method described in the book. Each section is 6" x 8".


I Initially thought the walls were going to be a disaster as after I had carved them out, coated in diluted PVA and primed they started crumbling badly, but I was able to stabilise them with a coat of neat PVA.

This is part of my first entry in the Analogue Hobbies Painting Challenge for this year, if you are not aware of the event I suggest you pop over there.

I hope to get a couple more of sections of orchard fabricated and painted over the next few weeks.

Wednesday, 4 December 2019

Phillippeville (3)


Last week my copy of Setting the Scene arrived and I will say I was enthused by reading it. At the moment I'm not working on any more Mediterranean terrain for the Spanish Civil War collection, but I got loads of ideas for my current projects so have ordered a load of Woodland Scenics stuff and while waiting for that to be delivered made a start on a few pieces for scatter in our games.

A trip to the local Michaels furnished me with some plywood bases, washed stones, washed grit, and coffee stirrers, a trip to the local DIY store got me two pints of 'Mooring Post' paint, 'spackle' (poly filler to us Brits) and glue. I was going to pick up a back of pine bark chips, but although it's only $3.50 for two cubic ft. Victoria did point out we live in an apartment, where did I plan to store a two cubic ft. sack of chippings, good point well made!

The first item is a animal pen with a gate using the instructions in the book, these are super easy to do and look much better than previous efforts. 


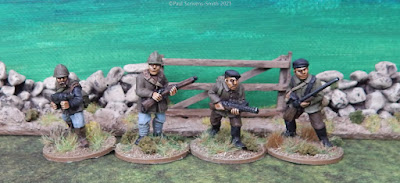
The 'wall' is more of a stone fence like those found here in North America, made up of piled stones revealed by the plough rather than assembled in a more European manner, although this will likely get use in our WWII games around my town of Phillipeville, it's going to be equally useful for my American Civil War games.


Next is a pumpkin patch, again, probably more use in our ACW games, but a handy piece of scatter none the less.


I picked up the pumpkins on the run up to Halloween from Michaels, I think they are some seed pod that they colour with orange dye, I gave them a coat of Army Painter flesh tone to bring the colour down a little.


I really rather like the next one, a small stable and animal pen built on to a section of an older collapsed building. The stones were this time built more wall-like with me laying them in successive layers.


The stable is made of coffee stirrers on a cardboard former that I knocked together, the fence posts are matchsticks and the fence planks are split coffee stirrers. I have a good selection of farm animals painted up and have just the donkey in mind for this piece.


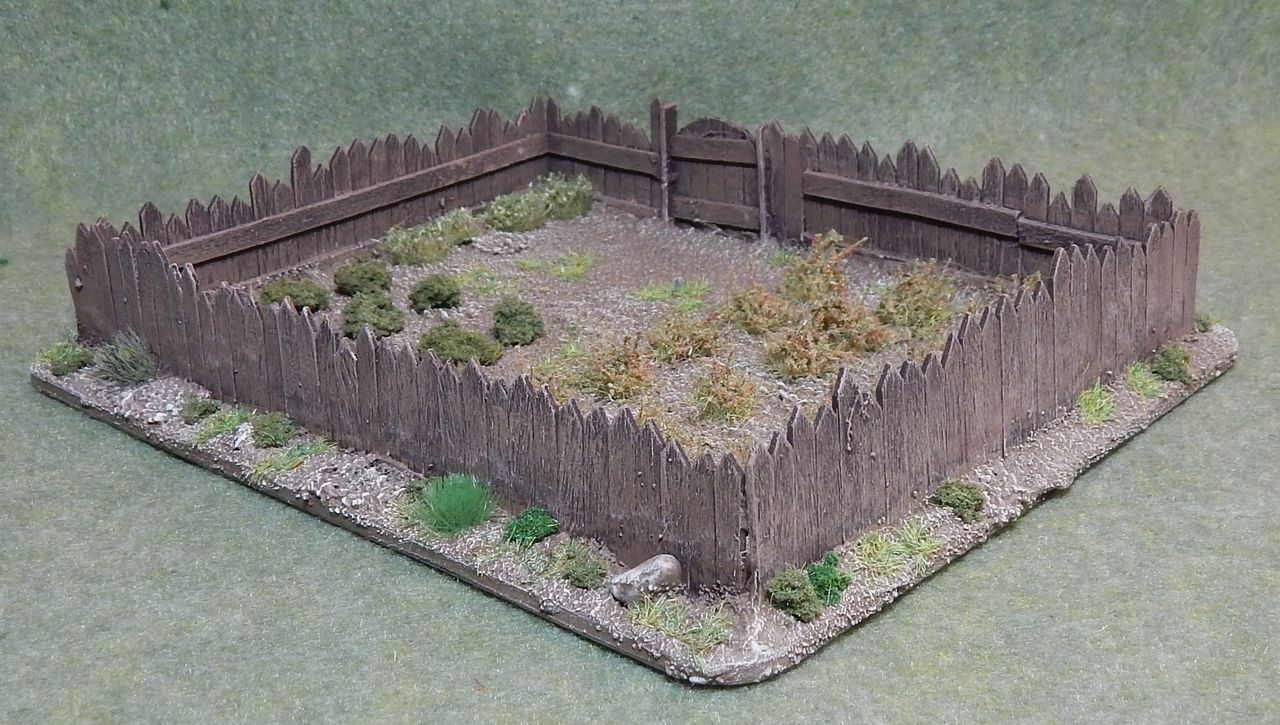
The next piece is a fenced off vegetable patch, the fence and gate are fabricated from coffee stirrers, while the veg are represented with either tufts or Woodland Scenic clumps.


It will add a nice bit of concealment in our games, more for breaking up line of sight rather than adding any degree of cover, that fence it to keep out the rabbits not .303 rounds!


Finally a couple of stone fences / stone walls, again I made the gate like the instructions in Setting the Scene and am very happy with how they turned out.


I may even get the opportunity to play a game one of these days!