I am currently revamping the boards to use in our demonstration game at Partizan next month so I dug out the old photos to show the thought process behind these.
For over 20 years I've been using the TSS terrain tiles and they were looking rather ratty, especially around the corners so I wanted to make some more durable terrain in 4ft x 2ft sections.
First of all, as the base is a 4ft x 2ft bit of hardboard (it may be MDF I cannot remember).
I then added a frame of 40mm x 25mm timber around the edge.
I just used a block to cut at a 45 degree angle
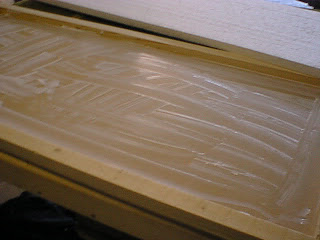
Next I gave the inner a good coating of PVA glue (I still have that pot of Evostick on the go eight years later)
Mmm, PVA glue
A suitably sized bit of polystyrene installation foam is inserted into the void.
In order that the edges of the large hills be as protected as the rest of the edge a section of the baton is added to the edge where the hill butts against it.
The ploystyrene hill is then stuck down, again with PVA glue
The hill is moulded to shape
In order to facilitate a water feature a section of the baton is chiseled out
The rive is then cut into the polystyrene. The whole thing is then given a coat of filler.
Next up the boards are all painted with Sandtex Bitter Chocolate masonry paint.
Now I want to add some light texture to the boards, for this I used B&Q Kiln Dried Sand, this is very fine.
Section by section the board is painted with a mix of Sandtex Bitter Chocolate and Sandtex Magnolia
While the paint is still wet the Kiln Dried Sand is sprinkled on.
Eventually covering the entire table - apart from the stream beds.
Once dried it's another coat of Bitter Chocolate to seal it
Here they are laid out in the sun to dry.
And here are some games in action, these are very old photos, I sold those Flame of War American Armoured amny years ago.
Anyway, after eight years, I'm now tarting up these boards for our game at Partizan in June so look out for some new images in a blog post soon.


Hopefully see them in the flesh, so to speak. They're nicely made and no mistake.
ReplyDelete:O)
Thanks, hopefully I'll be updating the blog with the refurbished article over the next few days.
ReplyDelete